# Site Configuration
This section describes site services to make it fully operational. The Site Configuration section is located at yourdomain.com/exchange-control-panel/settings.
You can always check our demo website (opens new window) to compare/refer to the settings.
# 1. General Settings
This section allows you to set general site settings, such as Site Name, Logo and maintain other configurations. See our demo example (opens new window)
# 2. Trading Rules
This section allows you to set trading rules (maker and taker fee), commission fee for the referred user, disabling/enabling market trades. See our demo example (opens new window)
# 3. Mail Settings & Notifications
This section allows you to adjust the system mail configuration. The system uses the Mail System to send various admin and user notifications by email. You can also enable/disable the specific notification. See our demo example (opens new window)
The system uses SMTP for user registration as well, so if you do not configure this section, the registration confirmation link will not be sent to your newly registered users.
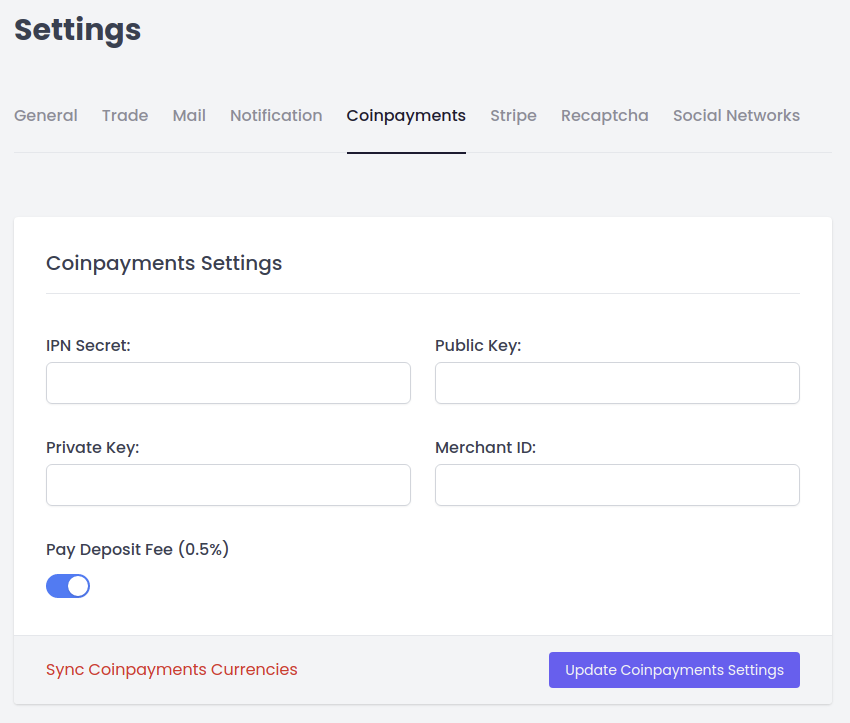
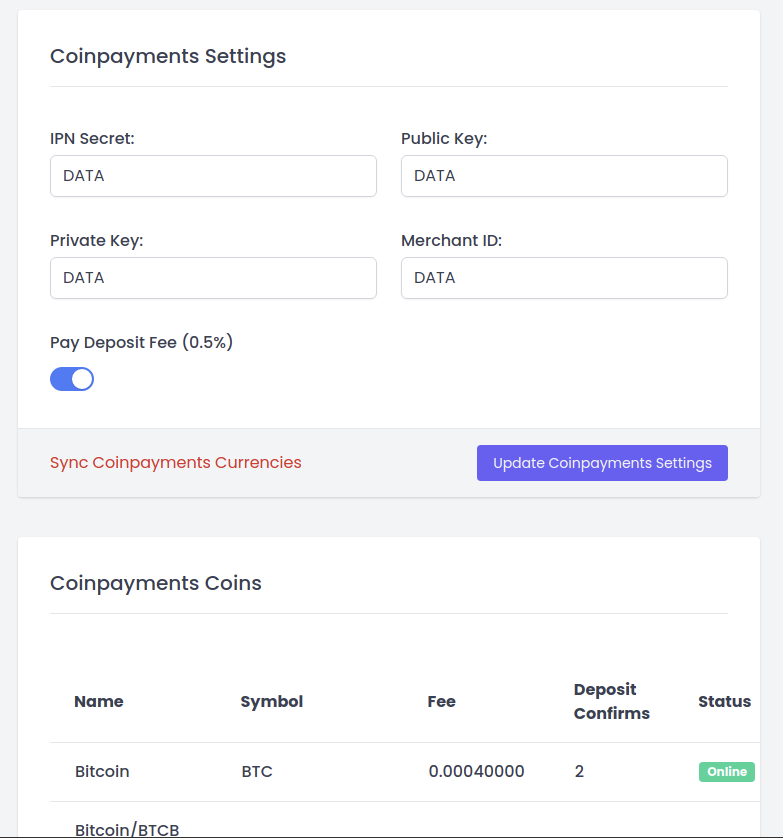
# 4. Coinpayments Settings
You have to fill Coinpayments Credentials in order to enable Cryptocurrency Deposit/Withdraw functions.
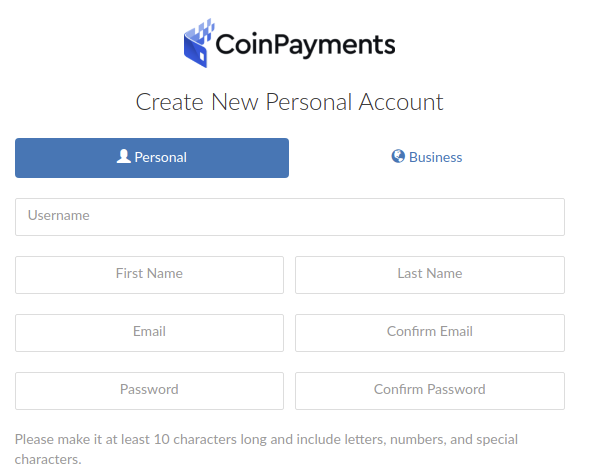
- You need to open Coinpayments Account (opens new window) to get API Credentials.
Pass KYC Verification to lift limits
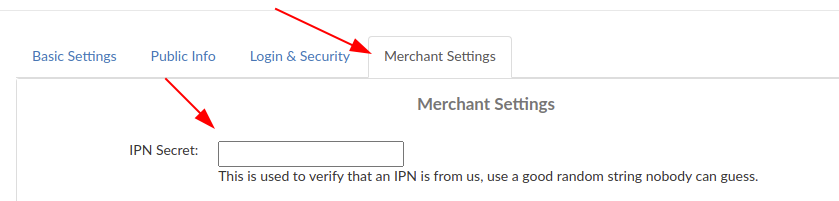
Get IPN Secret from this page https://www.coinpayments.net/acct-settings (opens new window)
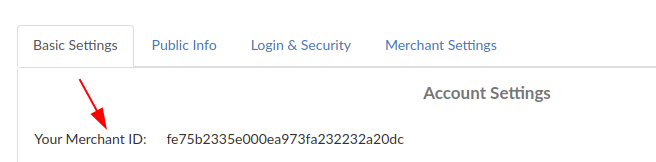
- Get Merchant ID from this page https://www.coinpayments.net/acct-settings (opens new window)
- Generate Public and Private Keys from this page https://www.coinpayments.net/acct-api-keys (opens new window)
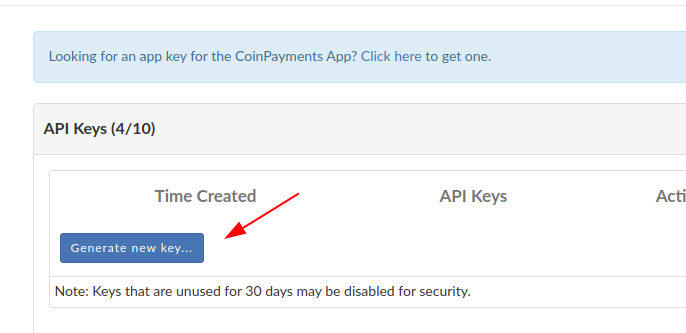
- Get Public and Private Keys
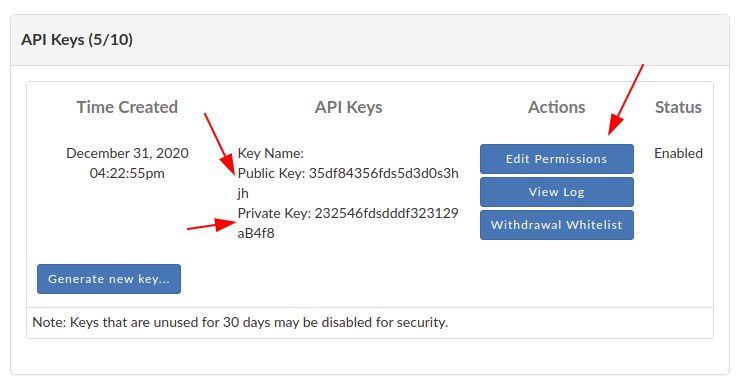
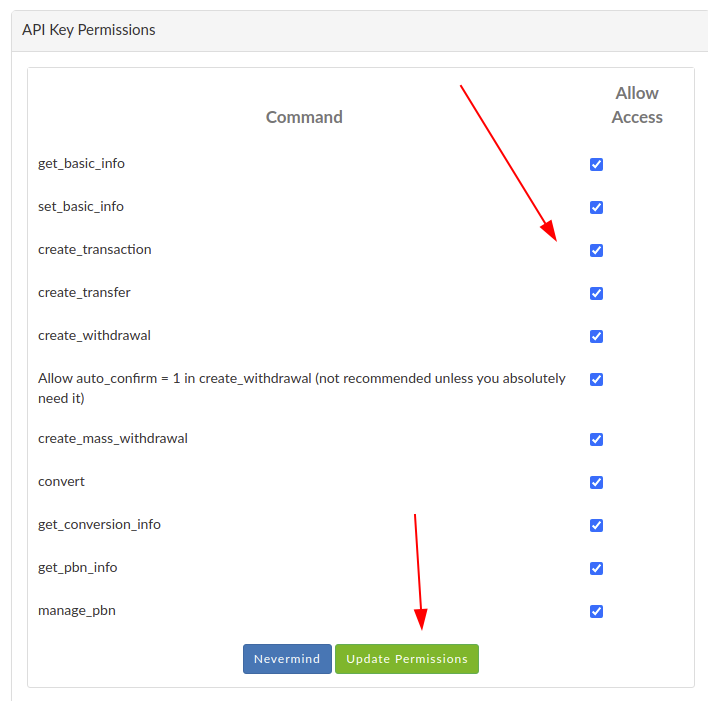
- Once the keys generated, click on Edit Permission Button. You will be navigated to Edit Permission Page. Scroll down to the API Key Permissions section, activate all checkboxes and click on Update Permission button.
Fill the site fields. After, click on Update button.
Click on Sync Coinpayments Currencies and you will see the list of available coins
See our demo example (opens new window)
# 5. Ethereum Settings
CEX Exchange supports Ethereum Network as well as ERC-20 based tokens. CEX Exchange was connected to Infura API to support this feature. See our demo example (opens new window) to fill the required fields.
You have to do the following steps:
- Register in Infura https://infura.io
- Create a project from Infura Dashboard
- Get connection string (string starts with
https://fulltext) - Open .env file and set APP_ETHEREUM_NODE="https://fulltext"
- Open http://etherscan.io and create new account
- Get API Key from the profile
- Open .env file and set APP_ETHERSCAN_KEY=""
# 6. BSC Settings
CEX Exchange supports BSC Network as well as BEP-20 based tokens. CEX Exchange was connected to Binance Smart Chain Node to support this feature.
- Register in https://bscscan.com
- Get API Key from the profile
- Open .env file and set APP_BSCSCAN_KEY=""
# 7. Tron Settings
CEX Exchange supports TRON Network as well as TRC-20 based tokens. CEX Exchange was connected to TronGrid Public Node to support this feature.
- Register in https://trongrid.io
- Get API Key from the profile
- Open .env file and set APP_TRONGRID_API=""
# 8. Bitcoin Node Settings
- Setup Bitcoin Node Server by following instructions described here (opens new window)
- Setup RPC AUTH and define webhook for
https://YOUR_SITE_URL/api/v1/gateways/bitcoin/BTCfor incoming transactions - Open
.envfile and set the following variables:
BITCOIND_HOST="IP_ADDRESS_OF_NODE_SERVER"
BITCOIND_PORT="BITCOIN_PORT_HERE"
BITCOIND_USER="RPC_USER_LOGIN"
BITCOIND_PASSWORD="RPC_USER_PASSWORD"
For Bitcoin Network to get the wallet access, no need to enter private/public keys, as it has different logic compared with other Nodes. When your user deposits BTC to his wallet, the main Node will receive these coins. You can withdraw coins by entering the Node server (by SSH), and running the commands described below:
Command:
bitcoin-cli sendtoaddress YOUR_BITCOIN_ADDRESS_HERE_TO_WITHDRAW BITCOIN_AMOUNT
Example:
bitcoin-cli sendtoaddress 1Lbcfr7sAHTD9CgdQo3HTMTkV8LK4ZnX71 0.552
IMPORTANT: You also need to make a backup wallet.dat file. Please check this article (opens new window) to follow.
# 9. Stripe
CEX Exchange supports manual Bank Transfers as well as Bank Card purchases. It uses Stripe Payment System to receive payments.
You need to open Stripe Account (opens new window) to get API Credentials.
Pass KYC Verification to lift limits
Get API Keys
- Setup Webhooks
Add new event with the type "charge.succeeded", and add the webhook url as follows https://YOUR_SITE_URL/api/v1/gateways/stripe
# 10. Recaptcha
This section allows you to enable the captcha protection feature provided by Google.
You need to open Recaptcha Account (opens new window) to get API Credentials.
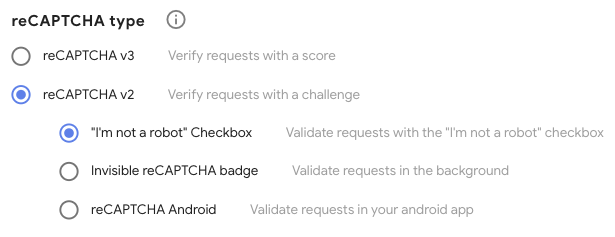
See our demo example (opens new window).
# 11. User Role Based Access
The system supports the following user types:
- Default user (slug: user)
- Admin user (slug: admin)
- Content Editor (slug: content_editor)
- User Editor (slug: user_editor)
- Assets Editor (Coins, Markets) (slug: assets_editor)
- Finance Manager (slug: finance_manager)
- P2P Customer Support (slug: p2p_appeal_judge)
- SuperAdmin (slug: superadmin)
By default, SuperAdmin user has access to all site section, while User role has access only to front part of the platform.
Admin user has access to the Admin Dashboard, but doesn't have access to its sections yet, so all user roles who should be accessed to the Admin Dashboard needs to be assigned to this role.
For example: If you want to give access Content Editor role, you have to first define this user as admin, so the system allows this user to be able to login to the Admin Dashboard.
To assign new role, you need to run Artisan commands from the server side (by doing ssh to the server and navigate to the project directory), and run the following command:
Assign the role:
php artisan role:manage HERE_USER_ID_OR_EMAIL SLUG_OF_ROLE set
Example:
php artisan role:manage [email protected] user_editor set
Remove the role:
php artisan role:manage [email protected] user_editor remove